Sunday, February 21, 2010

Comparison Medium Format and 35mm Equivalent Focal Lenghts

Usually, equivalent lens focal length tables use the diagonal angle of view as a reference (for example comparing medium format lens focal lenghts to other formats). This does not make sense as one needs to consider both, the image's length and width if one wants to capture a similar image! It makes a large difference if you want to end up with a square image or an aspect ratio of 3:2. You cannot take a similar photo with a different film's aspect ratio unless you crop.

Even worse, the popular page at photo.net has a few conversion errors in its calculations (probably wrong metric conversion factors). Moreover, it gives its results with a misleading and irrelevant precision of one position after the decimal point and does not show the results for 645 and 6x7 film!

Therefore I provide the following table, which gives different equivalent 35mm focal lenghts for popular 6x6 lenses (first columns) and different aspect ratios you want to end up with (larger focal lenght are rounded).


6x6 Medium Format Focal Length (mm) 35mm film 1:1 35mm film 5:4 35mm film 4:3 35mm film 3:2
40 17 21 22 25
50 21 26 28 32
60 25 32 34 38
75 32 40 42 48
80 35 42 45 50
150 65 80 85 95
250 105 135 140 160
300 130 160 170 190


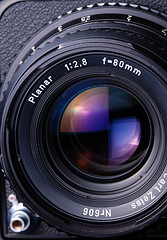
Let's take two examples: You want a square image and use a 80 mm lens on a 6x6 camera. You need a 35 mm lens for a 35mm camera (because you have an 24 mm x 24 mm image instead of 56 mm x 56 mm, this yields a factor of 3/7).
However, if you use the same 80mm lens on your medium format camera and do not want a square image but plan to crop it with an 3:2 aspect ratio, you need an 50 mm equivalent focal length for the 35mm film format. The frequently made comparison of medium format's 80mm with 35mm format's 50 mm lens is only valid if you want to have image with a 3:2 aspect ratio!
So essentially, you have two very popular lenses in one with your 80 mm lens on a square format! You have a wide and a normal lens. The same is true for your 150 mm lens: you have both, a long normal (65 mm equiv.) and a short tele lens (95 mm). Moreover, you will not encounter any sharpness or resolution problems when a medium format image is cropped to 3:2.
This table also shows how popular 35mm prime focal lenghts might have developed. For example, 150mm lenses are often considered as portrait lenses in medium format and the aspect ratio of 4:3 is also very popular with portraits. It requires a little cropping with both, medium and 35mm format. Now let's look at the column of the equivalent 35 mm focal length at 4:3. It's 85 mm, a very popular portrait focal length with 135 cameras! I am sure the manufacturers made the same calculations in recent times!
Similar calculations probably led to the also popular wide angle focal lengths of 28 mm and 35 mm (also in the 4:3 column).

If you have a 6x4.5 camera, you can simply use the first column for your medium format lenses and the 4:3 column for the 35mm equivalent, but as 6x4.5 is not exactly 4:3 but 112:83 (because it is 56 mm x 41.5mm), you can also use the following, more precise table which also comprises other popular focal lenghts.


6x4.5 Medium Format Focal Length (mm) 35mm film 1:1 35mm film 5:4 35mm film 112:83 35mm film 3:2
35 20 20 20 22
75 43 43 43 50
120 70 70 70 77
150 85 85 85 95

The following table relates to 6x7 cameras (70mm x 56 mm image) with their respective frequently available focal lengths.


6x7 Medium Format Focal Length (mm) 35mm film 1:1 35mm film 5:4 35mm film 4:3 35mm film 3:2
43 18 18 19 22
50 21 21 22 25
65 27 27 29 33
80 35 35 36 41
150 65 65 70 80
210 90 90 95 110

As 645 and 6x7 are not square formats, they also need to be cropped in order to become square. Therefore the equivalent 35mm focal length is the same as in their native aspect ratio.

Saturday, February 6, 2010

Testing Lens and Camera Shutter Speeds using Audio

Carl Zeiss Planar 1:2,8 f=80mmIt is very easy to test the shutter speeds of your lens or camera. You simply record it while you press the shutter and analyze the duration of the shutter sound.

I did this in order to check if my Zeiss Planar 80 mm f/2.8 lens was working correctly after its repair. Before the repair, 1 second nominal shutter speed lasted approximately 2 seconds (I did not test the exact shutter speed but it was obvious that it was too long because I could observe this with a watch!).

With old lenses, the shutter speeds in the range from 1/2 s to 1 s and 1/250 s to 1/500 s are often too slow and you have to add one or two thirds of a stop to the aperture in order to compensate for this. The intermediate speeds are usually okay.

I recorded the sound with a portable Zoom H2 MP3 recorder (it's no problem to use a Zoom in order to record fast primes!) at 48 kHz and 16 Bit. I used 48 kHz because it yields more samples and should be more accurate - at least theoretically. 44.1 kHz should also be fine. Of course any other microphone would also work.

I set the shutter speed, pressed the mirror pre-release, announced the selected shutter speed and pressed the shutter button. I release the shutter button about half a second after the shutter closed so the sound of the auxilliary shutter is separated from the sound of the diaphragm shutter. I recorded each shutter speed three times in order to test if they vary from time to time. I tested all speed from 1 s to 1/500 s.

Then I read the file into the computer and opened it with Audacity. Of course you can use any software that shows a time scale and has the ability to zoom into the track. The following image shows an example for the shutter speed of 1/2 s. The first noise is the mirror pre-release. The shutter is pressed at approximately 1:10.95 and closes at 1:11.5. Of course it is difficult to see where exacly the shutter opens and closes but I found the most reasonable values when I simply looked at the positions of the maximum peaks, in this case at 1:10.99 and 1:11.50. This means, the shutter opens for 510 milliseconds instead of the nominal 500 milliseconds. Thus it is only 2 % too slow. I think, this is pretty accurate for a mechanical shutter.


At 1:12.1 you see that the shutter button is released and the auxilliary shutter closes.

Please note that you need to compare your measured values to the acutal and not to the marked shutter speed (see table below). Use the right column in order to compare your results to the specified speed.


Marked shutter speed (1/s)   Actual shutter speed (1/s)   Duration (ms)  
1 1 1000
2 2 500
4 4 250
8 8 125
15 16 62.5
30 32 31.3
60 64 15.6
125 128 7.8
250 256 3.9
500 512 1.95
1000 1024 0.98

For fast speeds, one needs to zoom much more into the audio file and it becomes harder to determine the position of the maximum peaks. For me it worked still at 1/500 s which is the maximum speed for this lens.

I found all shutter speeds of my lens to be correct within 10 %. This means I do not need to correct for this and close the aperture anywhere in order to compensate for this.

Testing the shutter speeds this way is relatively simple, inexpensive and precise.

Tuesday, November 17, 2009

Finder comparison - 6x6 versus Digital 1.5 crop format (DX) and 135 Film Cameras

Usually your equipment does not give you to get better images, but sometimes it can really help. One of the major advantages of medium format SLR or TLR photography is the larger finder compared to both, 136 format and DX format digital photography. First I would like to show you the resulting Velvia slide, which was shot with an 80mm lens at EV 10.5 = 1/4 s at f/19, focussed to about 10 meters which should yield almost optimum depth of field.


I should have shot more wide open (for example at f/8) and I should have focussed closer because the image is not very sharp in 100% view scanned at 4000dpi (because of f/19 and focus distance of 10m). Anyway, the following image shows a medium format 99% finder image of 55mm x 55mm at 200 dpi (not really shot from the finder but scaled down from a scanned Velvia slide) - if you do not own the latest, brightest and most expensive focusing screen - less colorful, less contrast - less sharp (image is simulated, I did not include the crosshairs):


But I do not consider this to be a problem. It is not too bad if it appears worse in the finder than it really is - it might even help you to get better pictures. And it looks a little better with a modern focusing screen. The same subject in a DSLR with a crop factor of 1.5 (16mm sensor size, 95% finder, AF sensors not included) will look about like this:


I took the original image and only scaled it but did not alter color, contrast, or sharpness because modern finder usually look bright and clear. Of course the aspect ratio would be 3:2 instead of 1:1 as shown here, but if you want to end up with an aspect ratio of 1:1 (a square), you would need to crop. It is really shocking how much smaller the DSLR image is! The finder image will be larger if you plan to crop it or if you use a 135 film camera or an FX sensor (24mm image height = 24mm sensor size in portrait format = 135 film in landscape format):
Another large advantage is you usually use both of your eyes for focusing and composing. The image thus appears three dimensional. Moreover, you see detracting elements much easier in the frame because they are larger. With 6x6 you also do not need to rotate the camera - you can chose between square, landscape or portrait format after the image has been made.
As zoom lenses are much less common with medium format photography, you need to move in order to compose which also helps to find the best perspective. With zoom lenses, one often becomes lazy and does not try different perspectives in order to find the best one. But of course you can also use prime lenses with digital cameras and 135 SLRs.

Sunday, October 18, 2009

Whitewall Photolab Review

If you want to make large prints, it really makes sense to use medium format film (or even view cameras). Well exposed and sharp 135 film or DSLR images do not look any different to medium format images when printed small. Sure, 20 MP full frame digital cameras and medium format digital backs will also be fine, but medium format film is a very inexpensive method to obtain the same—or even better—results.

For a high quality and impressive print, the image of course needs to be sharp and well exposed.

I chose Whitewall because I saw images printed by Whitewall in a Lumas fine arts gallery - and I was impressed. Whitewall is the photo-lab which does all the printing for Lumas—and certainly for many other galleries.

Their prints are usually mounted on a backing board (aluminum di-bond) and are often covered with acrylic glass. I chose acrylic glass mounting for three of five prints and went without acrylic glass for the remaining two. You can mount the images directly to you wall and do not need a frame. And for my favourite pictures I did not want any disturbing frame.

Whitewall offers printer profiles on their website, so you can see what you will get on your monitor before submitting the image (if your monitor is calibrated). They also consider included color profiles.

You can choose any size and aspect ratio you like.

In my first test, I uploaded a DSLR image and chose only a small print. I was mainly interested if the color was accurate. The color was almost perfect and matched my screen. Only the black parts were a bit too dark, but they were okay if the print was brightly lit.

Then I uploaded 4 square medium format scans and ordered different sizes
  • 50 cm x 50 cm with acryl (20 x 20 square inches) = € 86
  • 65 cm x 65 cm with acryl (25 x 25 square inches) = € 136
  • 80cm x 80 cm without acryl (32 x 32 square inches) = € 126
So you pay about € 3,20 to € 3,44 per 10 cm x 10 cm (becomes a bit cheaper for larger areas).

This is the 50 cm x 50 cm image:

Beach Chairs

The original 8500 x 8500 pixels translate to 435 dpi when printed at 50 cm x 50 cm. I could have printed it more than 1 m wide (3 feet) with 200 dpi!

I ordered those two hand-held shots 65 cm x 65 cm:

Windfluechter

Hohes Ufer
And finally I ordered this one in 80 cm x 80 cm:

Beach Chair

Tone and color reproduction are perfect (almost exactly as shown on my screen). On the wall, they look like this:

DSC_6197

The images above look a bit more saturated here than they really are. A 100 % view from the upper right corner gives you a better impression on how the aluminum di-bond and acrylic glass look like (I did not make another shot, I simply cropped a full image. The bad quality of 100 % vieved DSLR images becomes apparent here):


The dimensions are exactly as stated in the order but Whitewall does not print 100 % of your file. I found they print 99 % of the image. This means that 2.5 mm of each side are missing on my 50 cm wide print (= about 50 pixels). This is no problem since other labs print 95 %, which means that 1.25 cm are missing on each side.

Whitewall makes very high quality prints, has a good website, good service, and a careful packaging. They even offer a proof print of a part of the image so you can be sure what color and tone you will get before you order a huge and expensive print. They are not really cheap but the results are worth it.

Thursday, October 8, 2009

Slide versus Negative (Fujifilm Velvia 50 vs Fujifilm Pro 160S)

Beach Chair
For this comparison, I shot the same subject first with Fujifilm Pro 160S and then with Velvia 50. It was made on July 14th, 2009 at 10 pm using a 80mm lens. I shot a backlit and high-contrast scene because I was curious about the larger latidude and tonal range that low contrast negative film like Fuji 160S is said to offer.
I took an incident reading at the beach chair in camera direction. For negative film, I reduced the exposure by a little more than one stop because of the back lighting and larger exposure latitude. I shot the 160 ASA negative thus at f/16 and 1 second (EV 8). The 50 ASA slide was shot at f/16 and 8 seconds (EV 5) without compensation because I shot it a little later and the sun was already set. The shot with Velvia 50 is shown above. The result with negative film is shown below.
The subject contrast is too large for both, slide and negative film. The negative still captures the sea, the sun and the sky. In the slide, the beach chair and the beach itself are exposed correctly, but the sky and the sea are intentionally overexposed. The slide is completely white here. Looks like there is nothing beyond the beach which looks much more interesting to me than a dull sun, sea and sky visible in the negative film.

The following comparison shows a crop of the left side of each image, scaled to 50 percent. Upper part: negative, lower part: slide. Velvia looks much more vivid but not sharper. There is more shadow detail due to the over exposure but negative film does not have any better highlights.

The next example shows part of the beach, the sea and the beach chair (click to see original file). Some clipped highlights are visible at the top of the beach chair but again the color looks much more vivid. I also increased the contrast of the image from the negative film by adjusting the curves, but I was not able to obtain the same or even similar result as with Velvia. Therefore it cannot be contrast alone which makes the image appear brighter and more detailed.


Negative film is able to capture high contrast scenes and still shows detail in the shadows and highlight but this does not mean that the image looks any better. To me, slide film looks much better in this case. Sharpness is the same, both in 50% and 100% view. These and some more images are collected in this Flickr album.

Wednesday, September 30, 2009

Film Highlight Rendition

Sunset Velvia
For many people, color is more important than sharpness. Velvia might have a lower contrast range and exposure latitude than negative film and maybe even good digital cameras. But film's highlight capabilities are still unbeaten. Look at the sky, the clouds and the sun are naturally rendered. There is no color cast (hue) from bright to very bright areas and no blown-out highlights. If you click at the image above, you see the 4000dpi scan scaled down to 10%. It was shot with a 150mm f/4 lens focussed at 65 meters at f/16 and 1/4s (EV10) on Velvia 50 film. I pointed the light meter to the sky and added 2 stops, so the sky appears bright and the sea appears not too dark. This exposure was just right, I also made a shot at EV9 but it was slightly to bright.
I love the section underneath the sun where the sea looks like magma or lava:
Sunset crop shot with velvia
Digital cameras tend to clip highlights which results in strange color casts, usually making skin appear orange or yellow and this bright orange and yellow sky appear white and greenish. I have tried to simulate the digital image. The following image shows a 200% simulated digital image with a mouse over comparison to the 50% analog image.


The digital image is of course not as sharp but also has clipped highlights but is brighter in the shadows. The sun is completely white and has greenish surroundings. The image from the film appears to have lower contrast but looks much more natural.

Sunday, September 20, 2009

4000dpi Medium Format Scan vs. 2000dpi Scan


Today I would like to compare 4000dpi vs 2000dpi scans. Tree shots are perfectly suited for sharpness comparisons. The shot was made by my friend Philipp with a Zeiss 50mm lens on Fuji Velvia 50 probably at EV 14, which is f/11 at 1/125s. It was shot hand-held. Its a beautiful subject in beautiful light. And the slight underexposure and vignetting helps to keep the attraction centered to the main subject. In 100% view the image is sharp, but not extremely sharp. It is a typical medium format sharpness. The image above shows the original scan rotated by 0.4 degrees and scaled to 5 percent. It was rotated in order to keep the black frame lines straight.
I used the original, non-rotated file and an image downsampled to 2000dpi (also not rotated) for the first comparison. I compared the original version at 100% and the downsampled file at a 200 % view and it was impossible to see a difference. I also did not see any difference between the 400 percent and 200 percent view.
Then I brought rotating into play. I rotated the original file and I rotated the downsampled file by the same amount. Then I enlarged both versions to 200 and 400 percent respectively and was finally able to see a difference (mouse over for the 2000 dpi version):


It is mainly the film grain which makes the first image appear sharper. No real details are lost but anyway the 2000dpi looks less sharp. Please consider that this is not a 100 % view but a 200 % and 400 % view. It is hard to see anything at 100 % here. I recommend 2000dpi scans when file size is critical and the shot is not extremely sharp from the beginning. You will still get top-quality compared to an image from a digital camera or a scan from 135 film. You will still get a good quality after rotating or other transforming but the quality of a transformed 4000dpi scan is clearly better - at least when you plan to make huge prints of it.