If you want to make large prints, it really makes sense to use medium format film (or even view cameras). Well exposed and sharp 135 film or DSLR images do not look any different to medium format images when printed small. Sure, 20 MP full frame digital cameras and medium format digital backs will also be fine, but medium format film is a very inexpensive method to obtain the same—or even better—results.
For a high quality and impressive print, the image of course needs to be sharp and well exposed.
I chose Whitewall because I saw images printed by Whitewall in a Lumas fine arts gallery - and I was impressed. Whitewall is the photo-lab which does all the printing for Lumas—and certainly for many other galleries.
Their prints are usually mounted on a backing board (aluminum di-bond) and are often covered with acrylic glass. I chose acrylic glass mounting for three of five prints and went without acrylic glass for the remaining two. You can mount the images directly to you wall and do not need a frame. And for my favourite pictures I did not want any disturbing frame.
Whitewall offers printer profiles on their website, so you can see what you will get on your monitor before submitting the image (if your monitor is calibrated). They also consider included color profiles.
You can choose any size and aspect ratio you like.
In my first test, I uploaded a DSLR image and chose only a small print. I was mainly interested if the color was accurate. The color was almost perfect and matched my screen. Only the black parts were a bit too dark, but they were okay if the print was brightly lit.
Then I uploaded 4 square medium format scans and ordered different sizes
- 50 cm x 50 cm with acryl (20 x 20 square inches) = € 86
- 65 cm x 65 cm with acryl (25 x 25 square inches) = € 136
- 80cm x 80 cm without acryl (32 x 32 square inches) = € 126
So you pay about € 3,20 to € 3,44 per 10 cm x 10 cm (becomes a bit cheaper for larger areas).
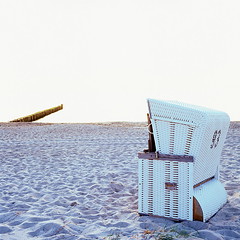
This is the 50 cm x 50 cm image:
The original 8500 x 8500 pixels translate to 435 dpi when printed at 50 cm x 50 cm. I could have printed it more than 1 m wide (3 feet) with 200 dpi!
I ordered those two hand-held shots 65 cm x 65 cm:
And finally I ordered this one in 80 cm x 80 cm:
Tone and color reproduction are perfect (almost exactly as shown on my screen). On the wall, they look like this:

The images above look a bit more saturated here than they really are. A 100 % view from the upper right corner gives you a better impression on how the aluminum di-bond and acrylic glass look like (I did not make another shot, I simply cropped a full image. The bad quality of 100 % vieved DSLR images becomes apparent here):
The dimensions are exactly as stated in the order but Whitewall does not print 100 % of your file. I found they print 99 % of the image. This means that 2.5 mm of each side are missing on my 50 cm wide print (= about 50 pixels). This is no problem since other labs print 95 %, which means that 1.25 cm are missing on each side.
Whitewall makes very high quality prints, has a good website, good service, and a careful packaging. They even offer a proof print of a part of the image so you can be sure what color and tone you will get before you order a huge and expensive print. They are not really cheap but the results are worth it.


